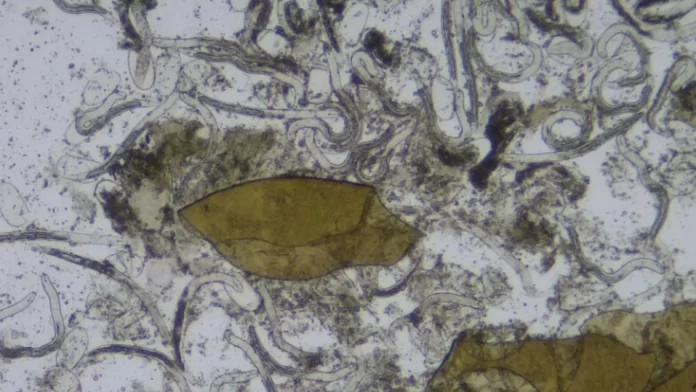
Nematode testing is a way of life at Aqua Farming near Christiana in North West. “It’s not a question of whether we will have nematodes on our potatoes, just how severe the infestation would be in a given season,” says owner and CEO Johan Greyling. For this reason, Greyling follows a standard preventative programme; curative treatment, however, is informed by test results.
Greyling started testing nematode population levels in 2011 and since then it has become an annual practice. The first samples are taken about six weeks after planting when the potato plants are growing actively. Approximately two weeks after the curative application, follow-up samples are taken in the same spots and tested again to ensure the problem has been sufficiently addressed. “We don’t even think about taking on the season without testing; the risk is simply too high.”
Harmful or plant-parasitic nematodes are difficult to control, let alone eradicate. The best, if not only, way to protect your crop is to know what you are dealing with before you plant. This explains why growers must take root and soil samples at the right time and in the right way, advises Professor Driekie Fourie, world-renowned nematologist, technical product lead at Syngenta Seedcare in South Africa and Extraordinary Professor at the NWU.
“This time of year is ideal to find out what’s going on beneath the surface of your fields,” she says. As soon as the crop plants start drying off and before you harvest, you should invest in nematode analyses to prepare for the upcoming season.”
Above-ground signs are not always enough to reliably identify the presence of harmful nematodes and determine the extent of the problem. In addition, prevention is always better than cure, especially in the case of soilborne diseases and pests that attack seedlings before they have developed the mechanisms to protect themselves.
Experience has taught Prof. Fourie that too many growers ignore nematode testing because they think it is too expensive, or too much effort and too time consuming, or because they don’t believe they have a problem. “The only way to really know is to measure,” she says, “particularly in this era of integrated pest management (IPM). The tests are indeed not cheap because they are done by trained staff using specialised equipment, but the cost is lower or at least on par with what you pay for fertiliser analyses and soil mapping. The same samples can also be used to determine (at an additional fee) the beneficial nematode population, which is an indicator of soil health.”
How to do nematode sampling:
There are a few golden rules to observe, but the process is simple.
1. Take the samples approximately six to eight weeks before harvesting (depending on the crop), when the crop is still active and the nematodes feeding. An approximate indication is, for example, if you plan to harvest at the end of June, take samples at the end of April to the middle of May. Soil samples taken in a bare field are of little or no value in the battle against nematodes. The nematode population in the current season is a reliable indicator of what you can expect in the next season, which enables you to take the necessary precautions, says Prof. Fourie. “Cold winters are highly effective in controlling nematode populations, but we don’t really get winters anymore that are cold enough. You can, therefore, count on the results you get in autumn.”
2. Do not take samples after heavy rains. Not only is it difficult and messy to dig in a waterlogged field, but the results are not entirely reliable.
3. Take samples of crop roots (or other plant material, eg, tubers) and soil. Endoparasites occur in the roots, while exoparasites live in the soil; both are therefore necessary for a comprehensive picture of the rhizosphere.
4. One sample is not enough to give useful results given the variety of factors that influence nematode pressure. A simple guideline is to divide your field in four blocks or segments and take 10 samples each from a spot with unhealthy plants and 10 from a spot with healthy plants. A handful (200 g to 300 g) of soil and a substantial piece of root/other below plant parts are all that’s needed. You can then combine the healthy and unhealthy samples taken in the same block into two of each category (healthy and unhealthy), leaving you with a total of four samples per block and 16 per field. This approach makes nematode testing more cost effective.
5. Place the combined samples in plastic bags and mark each one very clearly and carefully, eg, Block A (unhealthy plants) and Block B (healthy plants) and the date.
6. Immediately put the marked samples in insulated containers to keep them cool (not too cold or frozen) and out of the sun. Handle the samples with care, as certain nematode groups are easily damaged during handling.
7. It is important to deliver the samples as soon as possible to your nearest laboratory – the fresher the better, but no longer than two days after sampling.
South Africa has several reliable nematode laboratories that offer diagnostic services. Locations include Potchefstroom, Cape Town, Pretoria, Nelspruit and Upington. Be sure to use a laboratory managed by nematologists who are registered with the South African Council for Natural Scientific Professions (SACNASP). “The scientists and support staff at these laboratories have been trained properly and do the right tests, giving you peace of mind that the results can be trusted,” says Prof. Fourie.
Analyses cost around R350 – R400 each per root and soil sample and usually take between eight and 14 days to complete, depending on how busy the laboratory is and the number of samples submitted. The report you receive will clearly state the findings and indicate the severity of the infestation. It will furthermore include guidelines on what should be done (without mentioning specific plant protection products) to decrease harmful nematode populations. Growers can also contact the analyst for more information.
“Harmful nematodes are a major issue in sandy soils and for crops such as sunflower and soya, vegetables, specifically potatoes, as well as vineyards and deciduous fruit orchards,” notes Prof. Fourie. The same applies to industrial- and floricultural crops. “We are also seeing serious nematode damage to crops in clay soils. The message is therefore that growers should use all the tools available to understand what they are faced with before they invest in any IPM strategy such as crop rotation, crop protection products (including seed treatments), and other approaches.” Prof. Fourie emphasises that seed treatments are the first line of defense against harmful nematodes that often join forces with soilborne diseases to inflict severe damage on crops.
Seed treatment benefits include:
· Ease of use, seeing that growers purchase seed that has already been treated.
· The crop is protected from the outset, which gives the exposed seeds and young, vulnerable seedlings a head start and the potential to develop into strong, healthy plants that deliver higher than expected yields.
· Significantly smaller doses are applied across a significantly smaller section of a field, compared to broad-range or foliar applications.
· Contribute to sustainable crop production by supporting the conservation of essential resources such as soil, water and air.
· Act in harmony with nature as there are no or minimum detrimental impacts on beneficial, non-target organisms that perform much-needed functions in the soil.


