ARTICLE SOURCE: PUMPS-AFRICA.COM
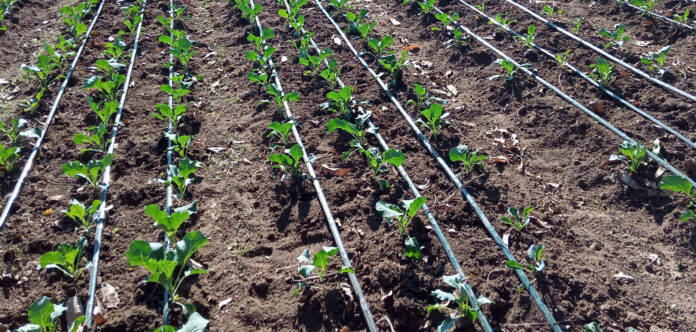
Irrigation is an essential part of modern agriculture. Proper irrigation can help increase crop yields and ensure a consistent supply of water to plants, even in times of drought.
Installing irrigation pipes is a crucial step in building an effective irrigation system for your farm. In this article, we will go through the step-by-step process of how to install irrigation pipes for agriculture.
Step 1: Choose the Right Irrigation Pipe
Choosing the right irrigation pipe is crucial to ensure that the water reaches the plants efficiently, consider the following when choosing your irrigation pipe:
- Material: The most common materials used for irrigation pipes are PVC, polyethylene (PE), polypropylene (PP), and polybutylene (PB). PVC pipes are durable, easy to install, and resistant to chemicals and UV rays. PE pipes are flexible and can handle high-pressure systems. PP pipes are resistant to high temperatures and chemicals, making them suitable for industrial and agricultural applications. PB pipes are
- Size: The size of the irrigation pipe depends on the flow rate and pressure required for your crop. A pipe that is too small can reduce water flow and affect crop yield, while a pipe that is too large can waste water and energy.
- Thickness: The thickness of the irrigation pipe affects its durability and resistance to pressure. Thicker pipes are more durable and can handle higher water pressure.
- Cost: The cost of the irrigation pipe depends on the material, size, and thickness. PVC pipes are generally the most affordable option, while PE pipes are more expensive.
- Environment: The type of soil, climate, and terrain in your farm can affect the choice of the irrigation pipe. For example, PVC pipes are susceptible to damage from UV rays and high temperatures, making them unsuitable for areas with high heat and sunlight exposure.
- Maintenance: Consider the maintenance requirements of the irrigation pipe. PVC pipes require minimal maintenance, while PE pipes may need periodic replacement due to wear and tear.
Choosing the right irrigation pipe is crucial to ensure that your crop receives adequate water supply and improve crop yields. Consider the material, size, thickness, cost, environment, and maintenance requirements when selecting the irrigation pipe for your farm. Consult with an irrigation expert or supplier to help you choose the right irrigation pipe for your specific needs.
Step 2: Measure and Mark the Layout
Before you start digging trenches for the irrigation pipes, you need to measure and mark the layout of your irrigation system. This will help you determine the pipe length, depth, and the location of the irrigation valves and sprinklers. Use flags or stakes to mark the location of the sprinklers, and measure the distance between them to determine the pipe length. Plan the layout to ensure the water is distributed evenly throughout the crop.
Step 3: Dig Trenches
Digging trenches is the most time-consuming part of installing irrigation pipes. The trenches should be deep enough to bury the pipes underground and wide enough to provide space for the sprinklers and valves. Use a trenching machine or shovel to dig the trenches. Make sure to remove any rocks or debris that can damage the pipes. The trenches should follow the layout that you marked in the previous step.
Step 4: Lay the Pipes
After digging the trenches, it’s time to lay the irrigation pipes. Start by placing the pipes in the trenches, making sure they fit securely and snugly. Connect the pipes using the appropriate connectors, such as couplings, tees, and elbows. Use PVC glue or adhesive to secure the joints and prevent any water leakage. Make sure to connect the pipes to the sprinklers and valves according to the layout you marked earlier.
Step 5: Install Valves and Sprinklers
Valves are an essential component of the irrigation system, as they control the water flow to the sprinklers. Install the valves at the point where the main pipe connects to the lateral pipes. Make sure to install the valves above ground level for easy access. The sprinklers should be installed at a uniform distance from each other, and the water flow rate should be adjusted to ensure uniform water distribution. You can use different types of sprinklers, such as rotary, impact, or spray sprinklers, depending on the crop and the soil type.
Step 6: Test the System
After installing the irrigation pipes, valves, and sprinklers, it’s time to test the system. Turn on the water and check for any leaks, water pressure, and uniform water distribution. If you notice any leaks or low water pressure, fix them immediately. Also, check the water flow rate and adjust the sprinklers to ensure that water reaches every plant in the crop. Testing the system will help you identify any issues before planting, ensuring that your crop receives adequate water supply.
Step 7: Cover the Trenches
After testing the system, cover the trenches with soil and pack it tightly to prevent any damage to the pipes. Make sure to leave a few inches of soil above the pipes to allow for future repairs or maintenance. You can also use a layer of mulch to prevent soil erosion and improve water retention.
Finally, installing irrigation pipes is a crucial step in building an efficient and effective irrigation system for agriculture. Choosing the right irrigation pipe, measuring and marking the layout, digging trenches, laying the pipes, installing valves and sprinklers, testing the system, and covering the trenches are the essential steps in installing irrigation pipes. Proper installation will ensure a consistent supply of water to your crop, improve crop yields, and save water and time. By following these steps, you can install an effective irrigation system for your farm and contribute to sustainable agriculture.


Thanks for the good information… I have ovacado hass trees around 150pcs, sorrouded by the river and the land has a gradual slope, kindly inform which type of irrigation system is best for me.. regards kamau in kitale Kenya
Kindly send me a copy of the document of email for future use. I am intending to do a market gardening project and thisceill prove handy to my objectives.
Comments are closed.